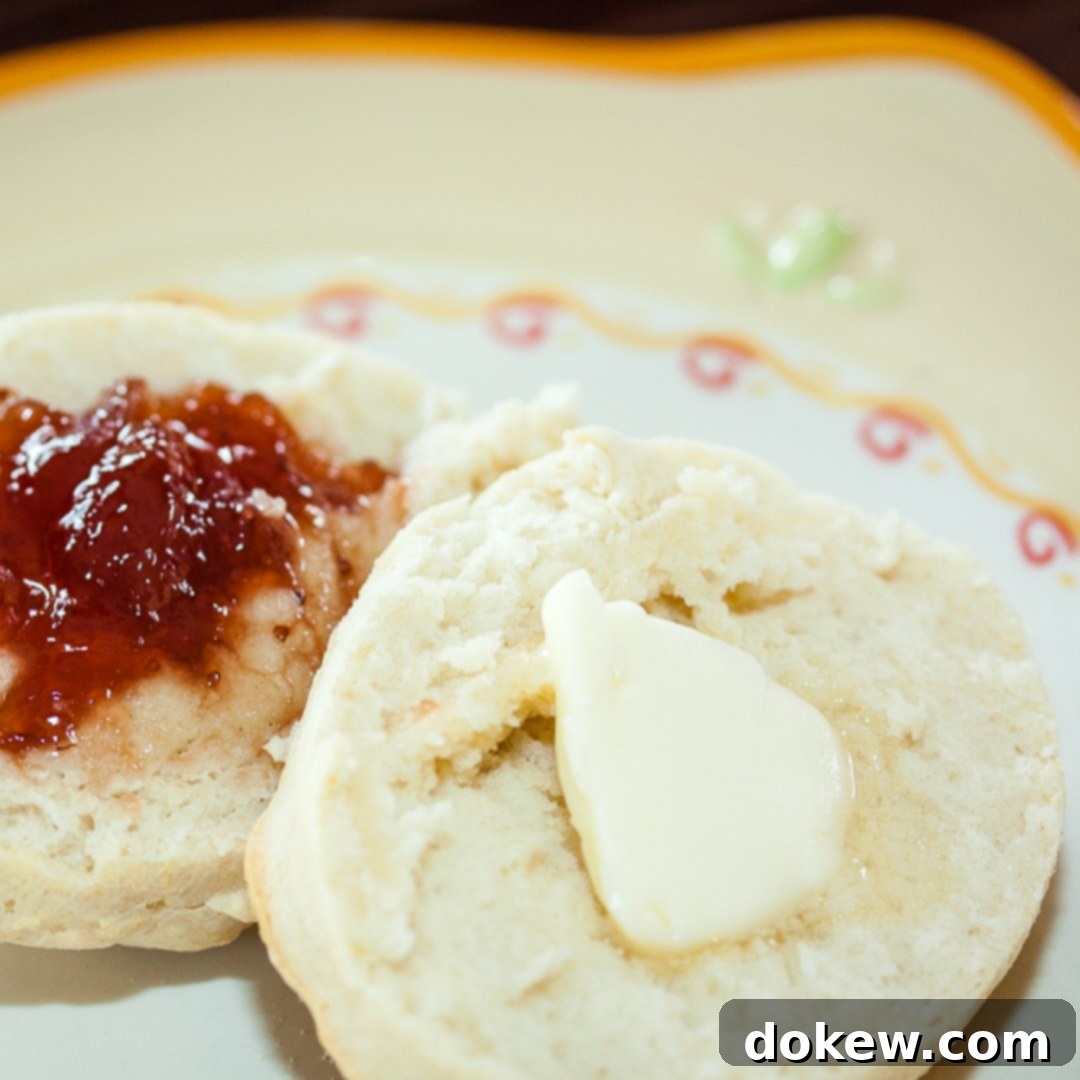
Fluffy 3-Ingredient Buttermilk Biscuits: Your Easiest Homemade Recipe (Freeze for Later!)
There’s nothing quite like the warmth and comfort of a freshly baked biscuit. Imagine sinking your teeth into a light, airy, and utterly delicious biscuit, knowing you made it from scratch with just three simple ingredients. This incredibly easy buttermilk biscuit recipe has been a family favorite for generations, passed down and perfected over the years. It’s a testament to how simple ingredients can create something truly extraordinary.
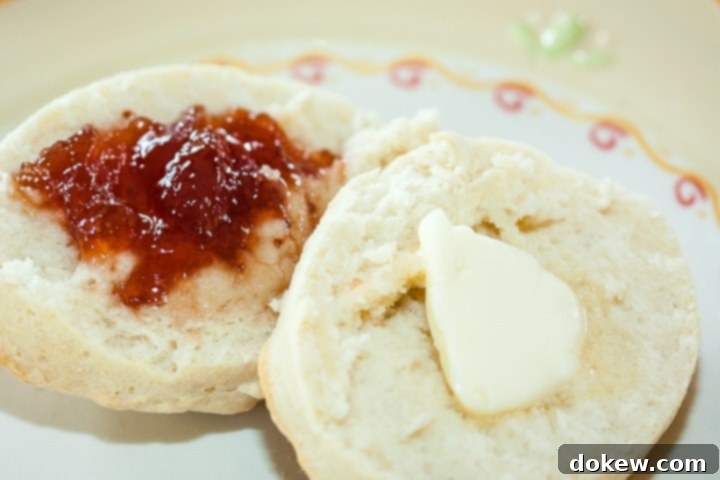
This recipe isn’t just easy; it’s also incredibly versatile. The same fundamental dough can be transformed into delightful treats like easy cinnamon rolls – just roll out the dough, spread with melted butter, sprinkle generously with cinnamon and sugar, then roll, slice, and bake. The possibilities extend beyond breakfast too; these biscuits make a perfect side for dinner, a base for a savory breakfast sandwich, or a sweet treat with your favorite fruit preserves.
One of the best aspects of this recipe is its generous yield. It makes a large batch, giving you the perfect opportunity to enjoy some freshly baked now and stock your freezer for later. Freezing half of the dough before baking means you can have warm, fluffy biscuits ready in minutes on any busy morning. Alternatively, baking them all and then freezing the cooked biscuits allows you to assemble convenient breakfast sandwiches ahead of time, saving you from store-bought alternatives and ensuring a homemade touch to your meals.
Crafting the Perfect 3-Ingredient Buttermilk Biscuit Dough
The foundation of these amazing biscuits lies in combining just three key ingredients: self-rising flour, butter, and real buttermilk. The key to their signature light and flaky texture begins with how you incorporate the butter into the flour. It’s not just about mixing; it’s about cutting the butter into the flour until it reaches a specific, crumbly consistency. This process creates small pockets of butter throughout the dough, which then release steam during baking, resulting in those coveted flaky layers.
To achieve this, you’ll want to start with cold butter, ideally cut into small cubes. Using cold butter prevents it from melting too quickly into the flour, which would lead to a denser biscuit. You can combine the flour and butter using a sturdy stand mixer fitted with dough paddles (a Bosch Universal is a great example), a traditional pastry cutter, or even a simple fork if you don’t have specialized tools. The goal is to “cut” the butter into the flour, breaking it down into pea-sized crumbs. Continue this until the mixture resembles coarse cornmeal. The visual in the photo below perfectly illustrates the desired texture – an even, crumbly consistency that promises a flaky outcome.
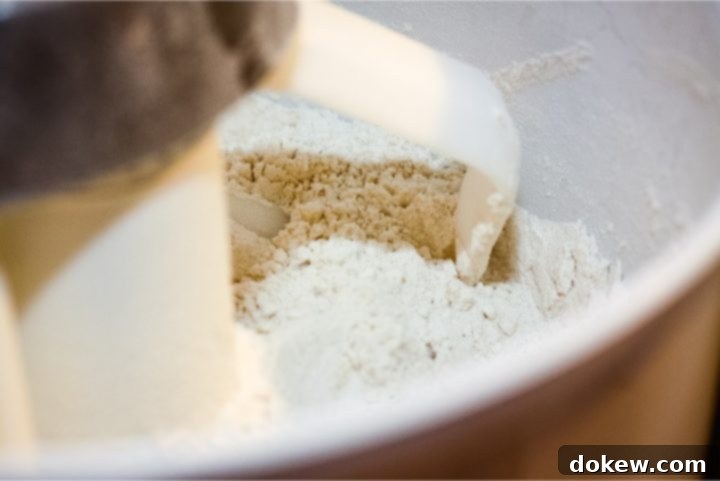
Once your flour and butter mixture has achieved that perfect crumbly, uniform consistency, you’re ready for the magical third ingredient: buttermilk. This is where the characteristic tang and tender texture of buttermilk biscuits truly come to life.
The Buttermilk Debate: Why Real Buttermilk is Essential (No Substitutes Here!)
The term “buttermilk” can sometimes be a bit confusing. Historically, buttermilk referred to the byproduct liquid left over after churning butter from cream. This traditional buttermilk was thin and slightly tangy. However, what we typically find in grocery stores today and use for baking is “cultured buttermilk.” This is regular milk that has been inoculated with specific bacteria cultures, which ferment the lactose and produce lactic acid. It’s the lactic acid that gives cultured buttermilk its distinctive tangy flavor, thicker consistency, and incredible leavening power when combined with the baking powder in self-rising flour.
While many online resources suggest DIY “soured milk” by adding lemon juice or vinegar to regular milk as a buttermilk substitute, for *this specific recipe*, and especially for truly authentic buttermilk biscuits, this is not the time for substitutions! The unique lactic acid content and slight viscosity of real cultured buttermilk are crucial for the distinct flavor profile and proper rise of these biscuits. Substituting soured milk will yield a noticeably different, and often disappointing, result in both taste and texture.
Don’t be too quick to discard buttermilk that has passed its “best by” date. Due to its high lactic acid content, cultured buttermilk often has a longer shelf life than regular milk. A “best by” date is a quality indicator, not an expiration date for safety. If yours is past this date, give it a good shake. Pour a small amount to check its consistency – it should be smooth, not lumpy or curdled (beyond its natural thickness). Finally, perform the smell test; if it smells sour or off in an unpleasant way, then it’s time to let it go. Otherwise, it’s likely still perfectly good for baking.
Rolling & Cutting Your Fluffy Buttermilk Biscuits
With the critical step of incorporating real buttermilk complete, it’s time to bring the dough together for its final mix. The dough should achieve a consistency that is slightly shaggy but comes together easily, pulling away from the sides of your mixing bowl without being overly sticky or dry. The photograph below beautifully illustrates this ideal texture – a cohesive mass that’s ready for the next stage of preparation.
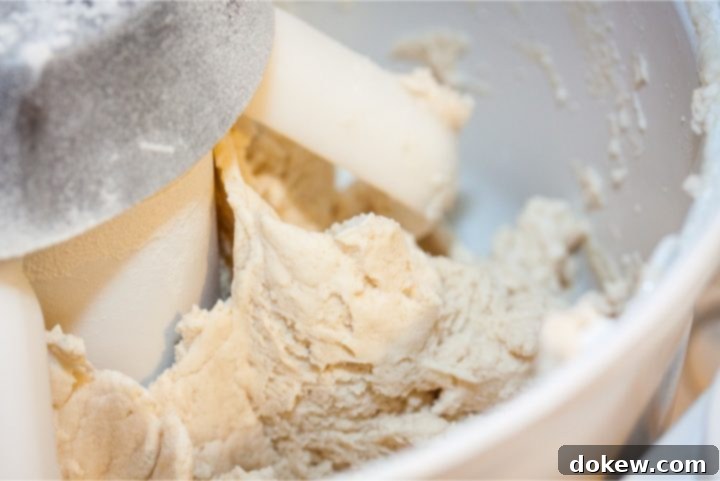
If your dough appears too wet and sticky, add a little more self-rising flour, a tablespoon at a time, until it reaches the desired workability. Conversely, if it seems too dry and isn’t coming together, add a splash more buttermilk. Remember, the goal is to work the dough as little as possible to ensure tenderness. Once the dough reaches a rollable consistency, gently knead it just a few times with your hands—just enough to form a cohesive ball—and then turn it out onto a lightly floured surface.
For rolling, a good setup can make all the difference. I highly recommend a silicone rolling mat for its non-stick properties and clear measurement guides, combined with a heavy marble rolling pin. The natural weight of a marble rolling pin allows you to achieve a consistent thickness with minimal effort and pressure, which helps prevent overworking the dough. A wooden rolling pin works perfectly fine too, but you might need a bit more physical effort to get that even roll.
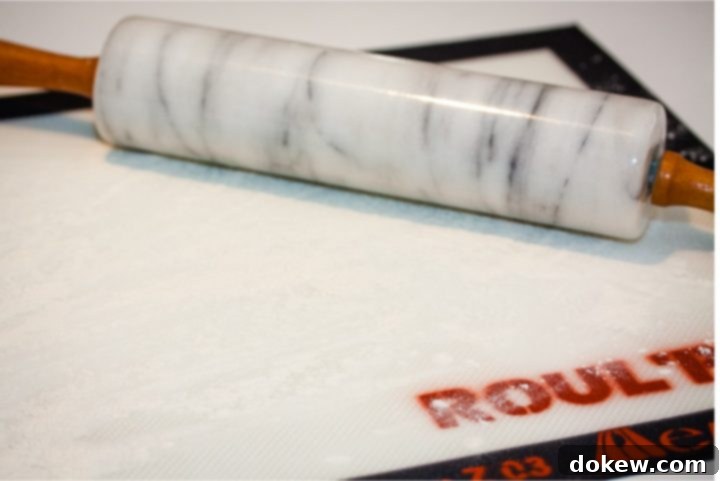
Roll the dough out to your preferred thickness. For classic, tall, and fluffy biscuits, I typically aim for about ¾ to 1 inch thick. A thicker dough yields a taller, more substantial biscuit, while a thinner roll will result in a crisper, flatter biscuit. Once rolled, use a sharp biscuit cutter to cut out your shapes.
The Secret to a High Rise: Why a Biscuit Cutter Matters
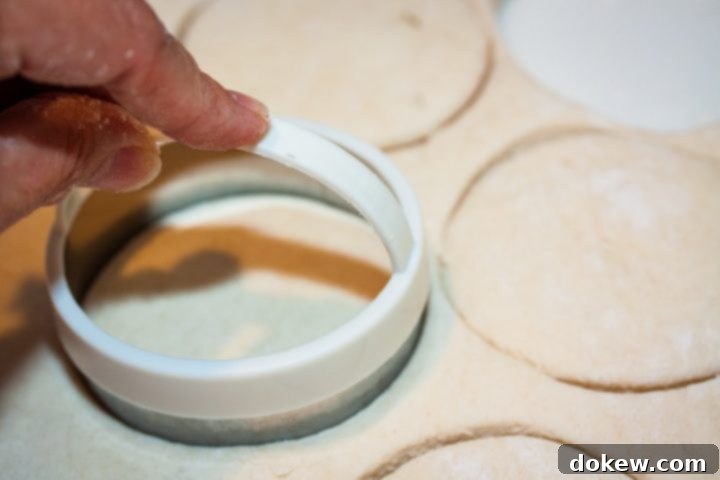
When you’re eager to bake, it might be tempting to reach for a drinking glass or a small bowl if you don’t have a dedicated biscuit cutter. However, for genuinely fluffy, tall-rising biscuits, a proper biscuit cutter is indispensable. The reason lies in its design: a biscuit cutter has a sharp, thin edge specifically engineered to slice cleanly through the dough. This clean cut is vital because it prevents the edges of the biscuit from sealing together.
A dull edge, like that of a drinking glass, will inadvertently pinch and seal the edges of the dough as you press down. When these edges are sealed, the biscuit dough can’t expand and “rise” as effectively during baking. The result is a biscuit that spreads out more than it rises, leading to a flatter, denser product instead of the light, airy texture you’re striving for. Invest in a good biscuit cutter – it makes a significant difference!
After you’ve cut out as many biscuits as possible from your initial roll, gather the remaining dough scraps. Gently press them together without overworking or adding excessive extra flour. Re-roll the combined dough and cut out more biscuits. You can repeat this process as needed until you’ve used all the dough. Try to avoid incorporating too much additional flour during these re-rolls, as this can toughen the biscuits.
Baking Your Golden Brown Buttermilk Biscuits
Once your biscuits are cut, arrange them on an ungreased cookie sheet. For taller, softer-sided biscuits, place them relatively close together so they can support each other as they rise. If you prefer crispier sides, space them further apart. Now, it’s time to bake! Preheat your oven to a high temperature, typically 475°F (245°C). The high heat is essential for a quick, dramatic rise, creating that light and fluffy interior.
Bake the biscuits until they are beautifully golden brown on top and bottom, which usually takes around 12-15 minutes, depending on their thickness and your oven’s calibration. Keep a close eye on them during the last few minutes, as they can go from perfectly golden to over-browned quite quickly. For an extra touch of flavor and a rich golden crust, you can brush the tops of the biscuits with a little melted butter before baking. Once baked, serve them warm with your favorite toppings!
Mastering the Freeze: Uncooked and Cooked Buttermilk Biscuits
This recipe is perfect for meal prepping and enjoying homemade goodness whenever the craving strikes. You can successfully freeze these delicious buttermilk biscuits, either before or after baking. This flexibility makes them an ideal candidate for batch cooking and ensures you always have a delightful treat or quick breakfast option on hand.
Freezing Uncooked Buttermilk Biscuits for Freshness Anytime
To enjoy fresh, hot biscuits with minimal effort on a busy morning, freezing them unbaked is an excellent strategy. After cutting out your biscuits, place the unbaked dough rounds in a single layer on a parchment-lined cookie sheet or other flat pan. Ensure they aren’t touching so they don’t freeze together. Place the sheet in the freezer for a few hours, or until the biscuits are solid. This “flash freezing” prevents them from sticking together when stored in a larger container.
Once completely frozen, transfer the biscuits into a dated, airtight freezer bag or container. They can be stored in the freezer for up to 2-3 months. Having a stash of frozen, uncooked biscuits means you can pull out just the number you need, whenever you want them, for that ultimate fresh-baked experience.
Freezing Cooked Buttermilk Biscuits for Quick Meals
If you prefer the convenience of fully baked biscuits ready to reheat, you can also freeze them after cooking. First, allow the freshly baked biscuits to cool completely on a wire rack. This is important to prevent condensation and ice crystals from forming in the freezer, which can make them soggy upon reheating. Once cooled, place the biscuits into a dated, airtight freezer container or wrap them individually in freezer wrap before placing them in a container or bag. They will keep well in the freezer for about 1-2 months.
This method is particularly handy if you plan to make breakfast sandwiches. Simply slice the cooked, cooled biscuits in half, fill them with your desired ingredients (like cooked sausage, egg, and cheese), wrap each sandwich tightly in freezer wrap, and then place them in a freezer-safe container. This creates an incredibly convenient grab-and-go breakfast option for busy weekdays.
Cooking and Reheating Frozen Buttermilk Biscuits
Having frozen biscuits is only half the battle; knowing how to properly cook or reheat them is key to maintaining their deliciousness.
- To Bake Uncooked Frozen Biscuits: You can bake these directly from frozen! Simply place them on a cookie sheet (you might want to line it with parchment paper). Increase the baking time by about 10-15 minutes compared to fresh biscuits. So, at 475°F (245°C), they will likely need around 25-30 minutes, depending on their thickness. Keep an eye on them for that golden-brown finish. If they start to brown too quickly on top before they’re cooked through, you can loosely tent them with aluminum foil.
- To Reheat Cooked Frozen Biscuits: For a quick reheat, you can warm them in a preheated oven at 350°F (175°C) for about 15-20 minutes, or until they are hot and warmed through. Again, if they start to brown excessively, cover them with foil.
- To Reheat Breakfast Sandwiches: If you’ve assembled breakfast sandwiches, wrap each sandwich in a paper towel (this helps absorb moisture and prevents them from getting soggy) and heat it in the microwave. Start with 2 minutes, then flip it over and heat for an additional 1-2 minutes, or until thoroughly heated through. This method provides a quick and satisfying breakfast in minutes.
Expert Tips for Perfect Buttermilk Biscuits Every Time
While this recipe is incredibly simple, a few expert tips can elevate your buttermilk biscuit game from good to absolutely phenomenal:
- Keep Ingredients Cold: Cold butter and cold buttermilk are crucial. The colder the butter, the better it holds its shape within the dough, creating those desirable flaky layers when it melts and creates steam in the hot oven.
- Don’t Overmix the Dough: Overmixing develops the gluten in the flour, which leads to tough, chewy biscuits. Mix just until the ingredients are combined and the dough comes together. A few gentle kneads are sufficient, but avoid prolonged handling.
- Use a Sharp Cutter (No Twisting!): As discussed, a sharp biscuit cutter is vital for a clean cut that allows for maximum rise. When cutting, press straight down and lift straight up. Do not twist the cutter, as twisting can seal the edges of the biscuit, hindering its ability to rise tall.
- Bake at a High Temperature: The high oven temperature (475°F/245°C) is key to a quick rise and a beautifully browned crust. It creates an initial burst of steam that lifts the biscuits.
- Arrange Biscuits for Tenderness: For softer, taller biscuits, place them almost touching on the baking sheet. They will support each other as they rise, resulting in more tender sides. If you prefer a crispier exterior on all sides, space them further apart.
- Serve Warm: Biscuits are always best served fresh and warm from the oven. Slather them with butter, your favorite jam, honey, or a savory gravy. They also make an excellent accompaniment to soups, stews, or fried chicken.
Recipe
Easy Buttermilk Biscuits
Add to Shopping ListGo to Shopping List
Ingredients
- 4 cups self-rising flour
- ½ cup butter, softened and cut into cubes
- 1-½ cups buttermilk, cold
Instructions
-
In a large mixing bowl, combine the self-rising flour and cold, cubed butter. Cut the butter into the flour using a pastry cutter, fork, or stand mixer until the mixture resembles coarse cornmeal.
-
Pour in the cold buttermilk and mix gently until just combined. The dough should be slightly shaggy but come together into a ball. If too wet, add a tablespoon of flour; if too dry, add a splash more buttermilk. Avoid overmixing.
-
Lightly flour a clean surface. Turn the dough out and gently knead it a few times (3-4 turns) to form a cohesive dough. Roll the dough to your desired thickness (about ¾ to 1 inch for tall biscuits). Using a sharp biscuit cutter, cut out the biscuits, pressing straight down and avoiding twisting. Gather scraps, gently re-roll, and cut remaining biscuits.
-
Preheat oven to 475°F (245°C). Place the biscuits on an ungreased cookie sheet. Bake for about 12-15 minutes, or until the tops are golden brown. Baking time will vary based on thickness and your oven. Serve warm.
Notes
Freezing Buttermilk Biscuits
These biscuits are highly freezer-friendly, whether cooked or uncooked.
To freeze uncooked biscuits: Place cut biscuits in a single layer on a parchment-lined cookie sheet and flash freeze for 2-3 hours until solid. Transfer frozen biscuits to a dated, airtight freezer bag or container. Store for up to 2-3 months. Bake from frozen at 475°F (245°C) for 25-30 minutes, or until golden brown.
To freeze cooked biscuits: Allow baked biscuits to cool completely. Place them in a dated, airtight freezer container or wrap individually in freezer wrap. Store for up to 1-2 months.
For freezer breakfast sandwiches: Slice cooled, cooked biscuits. Fill with desired ingredients (e.g., egg, cheese, sausage). Wrap each sandwich tightly in freezer wrap and place in a freezer container.
Reheating instructions for cooked frozen biscuits:
– If thawed, follow normal reheating instructions (350ºF for 15-20 min).
– If frozen, bake at 350ºF (175°C) for about 20-25 minutes, or until hot. Cover with foil if browning too much.
– To reheat breakfast sandwiches (frozen): Wrap in a paper towel. Microwave for 2 minutes, flip, and heat for an additional 1-2 minutes until heated through.
Nutrition per serving
Share
Pin
From a warm breakfast side to the perfect base for a homemade sandwich, these 3-ingredient buttermilk biscuits are incredibly versatile, easy to make, and a pure delight. With the added benefit of being freezer-friendly, you’re always just minutes away from a taste of comfort. So gather your simple ingredients, follow these steps, and prepare to enjoy the best homemade buttermilk biscuits you’ve ever had!
